Installing an exterior door is more than just a home improvement task—it’s a key investment in your home’s security, energy efficiency, and curb appeal. A properly installed door not only keeps out the elements but also enhances the overall appearance of your property. Whether you are replacing an old, weathered entry or adding a brand-new exterior door, the process requires careful preparation, precise measurements, and proper sealing to ensure long-lasting performance. Understanding each stage will help you complete the project with professional-level results.
Preparing for an Exterior Door Installation
Before you begin installing an exterior door, preparation is essential. The first step is removing the old door, which involves unscrewing the hinges and carefully lifting it from the frame. Once the door is out, the old frame, threshold, and any damaged trim should be removed. This ensures you have a clean, level opening for the new installation. During this stage, it is crucial to inspect the subfloor and surrounding wall structure for any signs of rot or damage. Repairing these issues beforehand will prevent future structural problems and ensure the new door fits perfectly.
Why Proper Exterior Door Installation Matters
An improperly installed exterior door can cause a host of problems—air leaks, water damage, higher energy bills, and even compromised home security. Professional installation ensures that the door seals tightly, opens smoothly, and stands up to the elements. But with the right guidance, even a skilled DIYer can handle the task successfully.
Tools and Materials You’ll Need
Before diving in, gather the necessary tools and materials. Having everything on hand makes the process smoother and avoids unnecessary delays.
Essential Tools:
- Tape measure
- Level
- Pry bar
- Hammer or nail gun
- Cordless drill and bits
- Screwdriver
- Utility knife
- Circular saw (if trimming is needed)
Tape measure
A tape measure is essential for taking accurate measurements before cutting or installing materials. It ensures that every piece fits perfectly into place, reducing mistakes. Always double-check measurements to avoid costly errors.
Level
A level helps you make sure doors, frames, and trim are perfectly straight and aligned. Proper leveling prevents operational issues, such as doors swinging open or sticking. This tool is vital for a professional-looking installation.
Pry bar
A pry bar is used for removing old doors, frames, or trim without causing unnecessary damage. Its sturdy design provides leverage to lift and separate materials. It’s especially useful for renovation or replacement projects.
Hammer or nail gun
A hammer or nail gun is needed for securing frames, trim, and other components during installation. Nail guns save time on larger projects, while hammers are more precise for smaller adjustments. Both are essential for a sturdy fit.
Cordless drill and bits
A cordless drill and bits make it easy to create holes and drive screws quickly. They are versatile tools that work on wood, metal, or composite materials. Having multiple bit sizes ensures you’re prepared for any fastening task.
Screwdriver
A screwdriver is necessary for tightening or adjusting screws in door hardware and hinges. Manual screwdrivers are great for fine-tuning, while power screwdrivers speed up the process. Keep both Phillips and flathead types handy.
Utility knife
A utility knife is perfect for trimming materials like insulation, caulk, or flashing tape. Its sharp blade allows for precise cuts without damaging surrounding areas. Always use a fresh blade for clean, smooth results.
Circular saw (if trimming is needed)
A circular saw is used to cut wood or composite materials to the exact size needed. It’s especially useful when adjusting door frames or trimming excess material. Always follow safety precautions when using power saws.
Materials:
- Pre-hung exterior door
- Wood shims
- Caulk and caulking gun
- Exterior-grade screws
- Insulation foam for doors and windows
- Flashing tape
Pre-hung exterior door
A pre-hung exterior door comes already mounted on its frame, making installation easier and faster. It ensures proper alignment and a tight seal against the elements. This option saves time and ensures a professional finish.
Wood shims
Wood shims help adjust and level the door within the frame. They are inserted to create the perfect fit before securing everything in place. Shims prevent gaps and ensure smooth operation.
Caulk and caulking gun
Caulk and a caulking gun are used to seal gaps between the door frame and wall. This prevents drafts, moisture, and pests from entering. A smooth, consistent bead of caulk improves both performance and appearance.
Exterior-grade screws
Exterior-grade screws are designed to withstand weather and resist rust. They provide strong, long-lasting fastening for exterior doors. Always use screws recommended for your specific door installation.
Insulation foam for doors and windows
Insulation foam expands to fill gaps around doors and windows, creating an airtight seal. This helps improve energy efficiency and comfort. Choose a low-expansion foam to avoid bowing the door frame.
Flashing tape
Flashing tape protects against water infiltration around the door frame. It creates a waterproof barrier that helps prevent leaks and rot. Proper application is key for long-term durability.
Measuring the Door Opening Accurately
An accurate measurement is the foundation of a successful exterior door installation. Using a tape measure, determine the height and width of the rough opening, along with the thickness of the wall. The new door unit should be slightly smaller than the opening to allow for adjustments and proper shimming. A common mistake is to measure only the existing door slab rather than the entire frame opening, which can result in an improper fit. Taking multiple measurements at different points ensures accuracy, as walls and floors are rarely perfectly square.
Choosing the Right Exterior Door
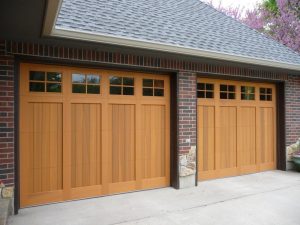
The type of exterior door you select can significantly impact your home’s aesthetics, security, and insulation. Solid wood doors offer timeless elegance but require maintenance to withstand the elements. Steel doors provide excellent durability and security at a more affordable cost, while fiberglass doors offer a balance of strength, energy efficiency, and low maintenance. Whichever material you choose, ensure it is designed for exterior use and rated for your climate. Features such as energy-efficient glass panels, weather stripping, and insulated cores can greatly enhance the door’s performance.
Setting the New Door in Place
Placing the new exterior door into the opening requires both precision and patience. Begin by applying a generous bead of caulk along the underside of the threshold to create a weatherproof seal. With the help of another person, carefully lift the door unit and set it into the rough opening. Ensure that the threshold sits firmly on the subfloor and that the door frame is centered. This step is critical for ensuring the door opens and closes smoothly without rubbing against the jamb or floor.
Leveling and Securing the Door Frame
A door that is not level will never function properly, so this stage demands close attention. Use a carpenter’s level to check both the vertical and horizontal alignment of the door frame. Once the door is perfectly plumb, insert shims between the frame and the wall studs at the hinge locations and along the latch side. These shims provide structural support and keep the frame from shifting over time. After confirming the alignment, drive screws through the frame and shims into the wall studs to lock the door into place securely.
Installing Hinges and Hardware
Hinges are the backbone of any exterior door’s operation, and proper installation ensures smooth movement and long-term reliability. Attach the hinges to the pre-cut mortises on the door edge, making sure they are flush with the surface. Secure them firmly to prevent sagging over time. Once the door is hung, install the latch, strike plate, and lockset. A high-quality deadbolt lock is recommended for additional security, especially for front and back entry doors. Each piece of hardware should be aligned precisely to prevent binding or difficulty in operation.
Applying Weatherproofing Measures
An exterior door must be weatherproofed to protect against rain, wind, and temperature fluctuations. Installing weather stripping around the edges of the frame creates a tight seal that keeps drafts out and prevents energy loss. Caulking along the exterior trim and siding further blocks moisture from seeping into the walls. In colder climates, a door sweep along the bottom edge can significantly reduce heat loss during winter months. Proper weatherproofing not only improves comfort but also extends the lifespan of your door by preventing water damage.
Finishing Touches for a Professional Look
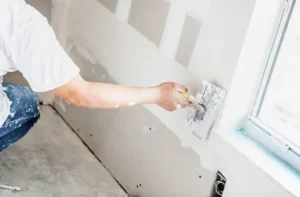
The final stage of installing an exterior door involves adding the trim and any necessary paint or stain. Interior and exterior trim help conceal gaps between the frame and the wall, giving the installation a polished appearance. If your door is unfinished wood, applying a protective stain or paint will enhance its look and shield it from environmental wear. Even factory-finished doors can benefit from touch-ups to cover any scratches or marks from installation. Cleaning the glass panels and lubricating the hinges completes the process, leaving you with a fully functional and attractive new entryway.
Common Mistakes to Avoid During Installation
Several common errors can compromise the performance of an exterior door. Failing to measure accurately can result in gaps that let in drafts and moisture. Skipping the weatherproofing steps can lead to water infiltration and wood rot. Over-tightening screws can warp the frame, making the door difficult to operate. Rushing through the leveling process often results in a door that swings open or closed on its own. Taking the time to follow each step carefully is the best way to ensure a long-lasting installation.
When to Hire a Professional for Exterior Door Installation
While many homeowners are capable of installing an exterior door themselves, certain situations call for professional help. If the door opening is significantly out of square or if the surrounding structure shows signs of extensive damage, a skilled contractor can make the necessary adjustments. Installing specialized doors, such as those with sidelights or custom glass designs, often requires advanced carpentry skills. Additionally, hiring a professional can save time and ensure the installation meets all local building codes.
Maintaining Your New Exterior Door
Once your exterior door is installed, regular maintenance will keep it in optimal condition. Inspect the weather stripping annually and replace it if it becomes worn or loose. Check the hardware periodically to ensure the hinges and locks remain secure. Cleaning the door’s surface with mild soap and water will help preserve its appearance, while reapplying paint or sealant every few years protects it from weather damage. By staying on top of maintenance, you can enjoy a secure, attractive, and efficient entryway for many years.
People Also Asked Questions (FAQs)
Can I install an exterior door by myself?
Yes, with the right tools, measurements, and patience, many DIYers can install one successfully.
How long does it take to install an exterior door?
For a standard pre-hung door, expect 3–6 hours, depending on your skill level.
Do I need a permit to install an exterior door?
In some areas, yes—especially if you’re altering the size of the opening.
What’s the best material for an exterior door?
Steel and fiberglass are popular for durability and security, while wood offers classic appeal.
How can I make my exterior door more energy-efficient?
Choose a door with an insulated core, install quality weatherstripping, and ensure a tight seal.